About this task
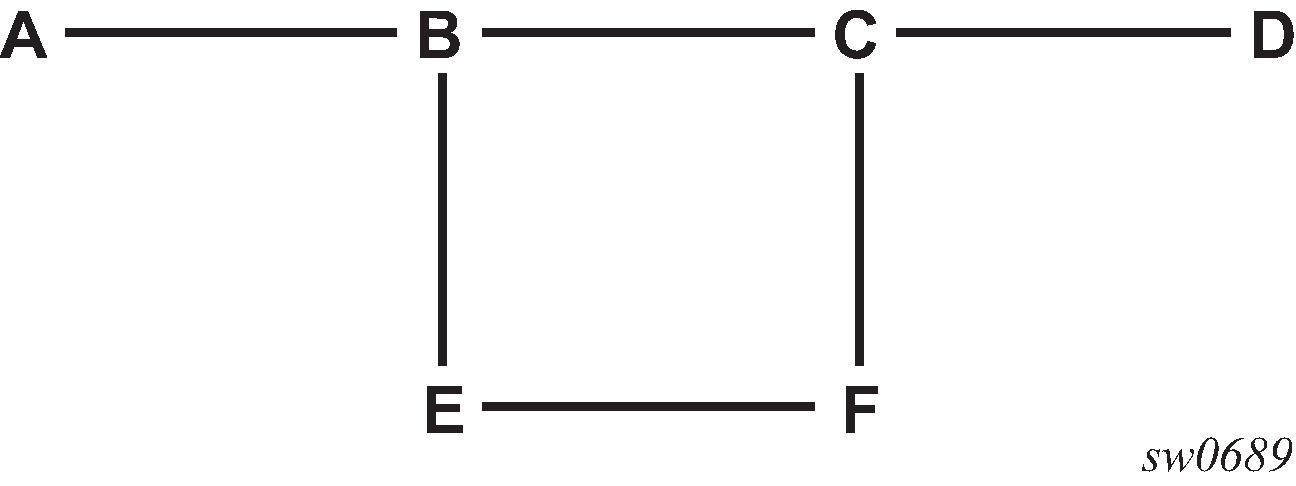
Consider the network setup in the following figure that shows nodes A through F.
Figure: Manual bypass tunnels
The user first configures the option to disable the dynamic bypass tunnels.
Listed below are the steps to configure the manual bypass tunnels.
Procedure
- Configure the option to disable the dynamic bypass tunnels on the 7210 SAS node B (if required). The CLI for this configuration is: config>router>mpls>dynamic-bypass [disable | enable] The dynamic bypass tunnels are enabled by default.
-
Configure an LSP on node B, such as B-E-F-C which is used only as bypass. The
user specifies each hop in the path, for example, the bypass LSP has a strict
path.
Note that including the bypass-only keyword disables the following options under the LSP configuration:
-
bandwidth
-
fast-reroute
-
secondary
-
adaptive
-
adspec
-
cspf
-
exclude
-
hop-limit
-
include
-
metric
Example Bypass tunnel configuration outputA:7210 SAS>config>router>mpls>path# info ------------------------------------------- ... path "BEFC" hop 10 10.10.10.11 strict hop 20 10.10.10.12 strict hop 30 10.10.10.13 strict no shutdown exit lsp "bypass-BC" to 10.10.10.15 primary "BEFC" exit no shutdown ... ------------------------------------------- A:7210 SAS >config>router>mpls>path# -
-
Configure an LSP from A to D and indicate fast-reroute bypass protection,
select the facility as "FRR method"
(config>router>mpls>lsp>fast-reroute
facility).
Observe if the following criteria apply:
-
if the LSP passes through B
-
a bypass is requested
-
the next hop is C
-
a manually configured bypass-only tunnel exists from B to C (excluding link B to C)
Expected outcome Node B uses the manually configured bypass-only tunnel from B to C. -